
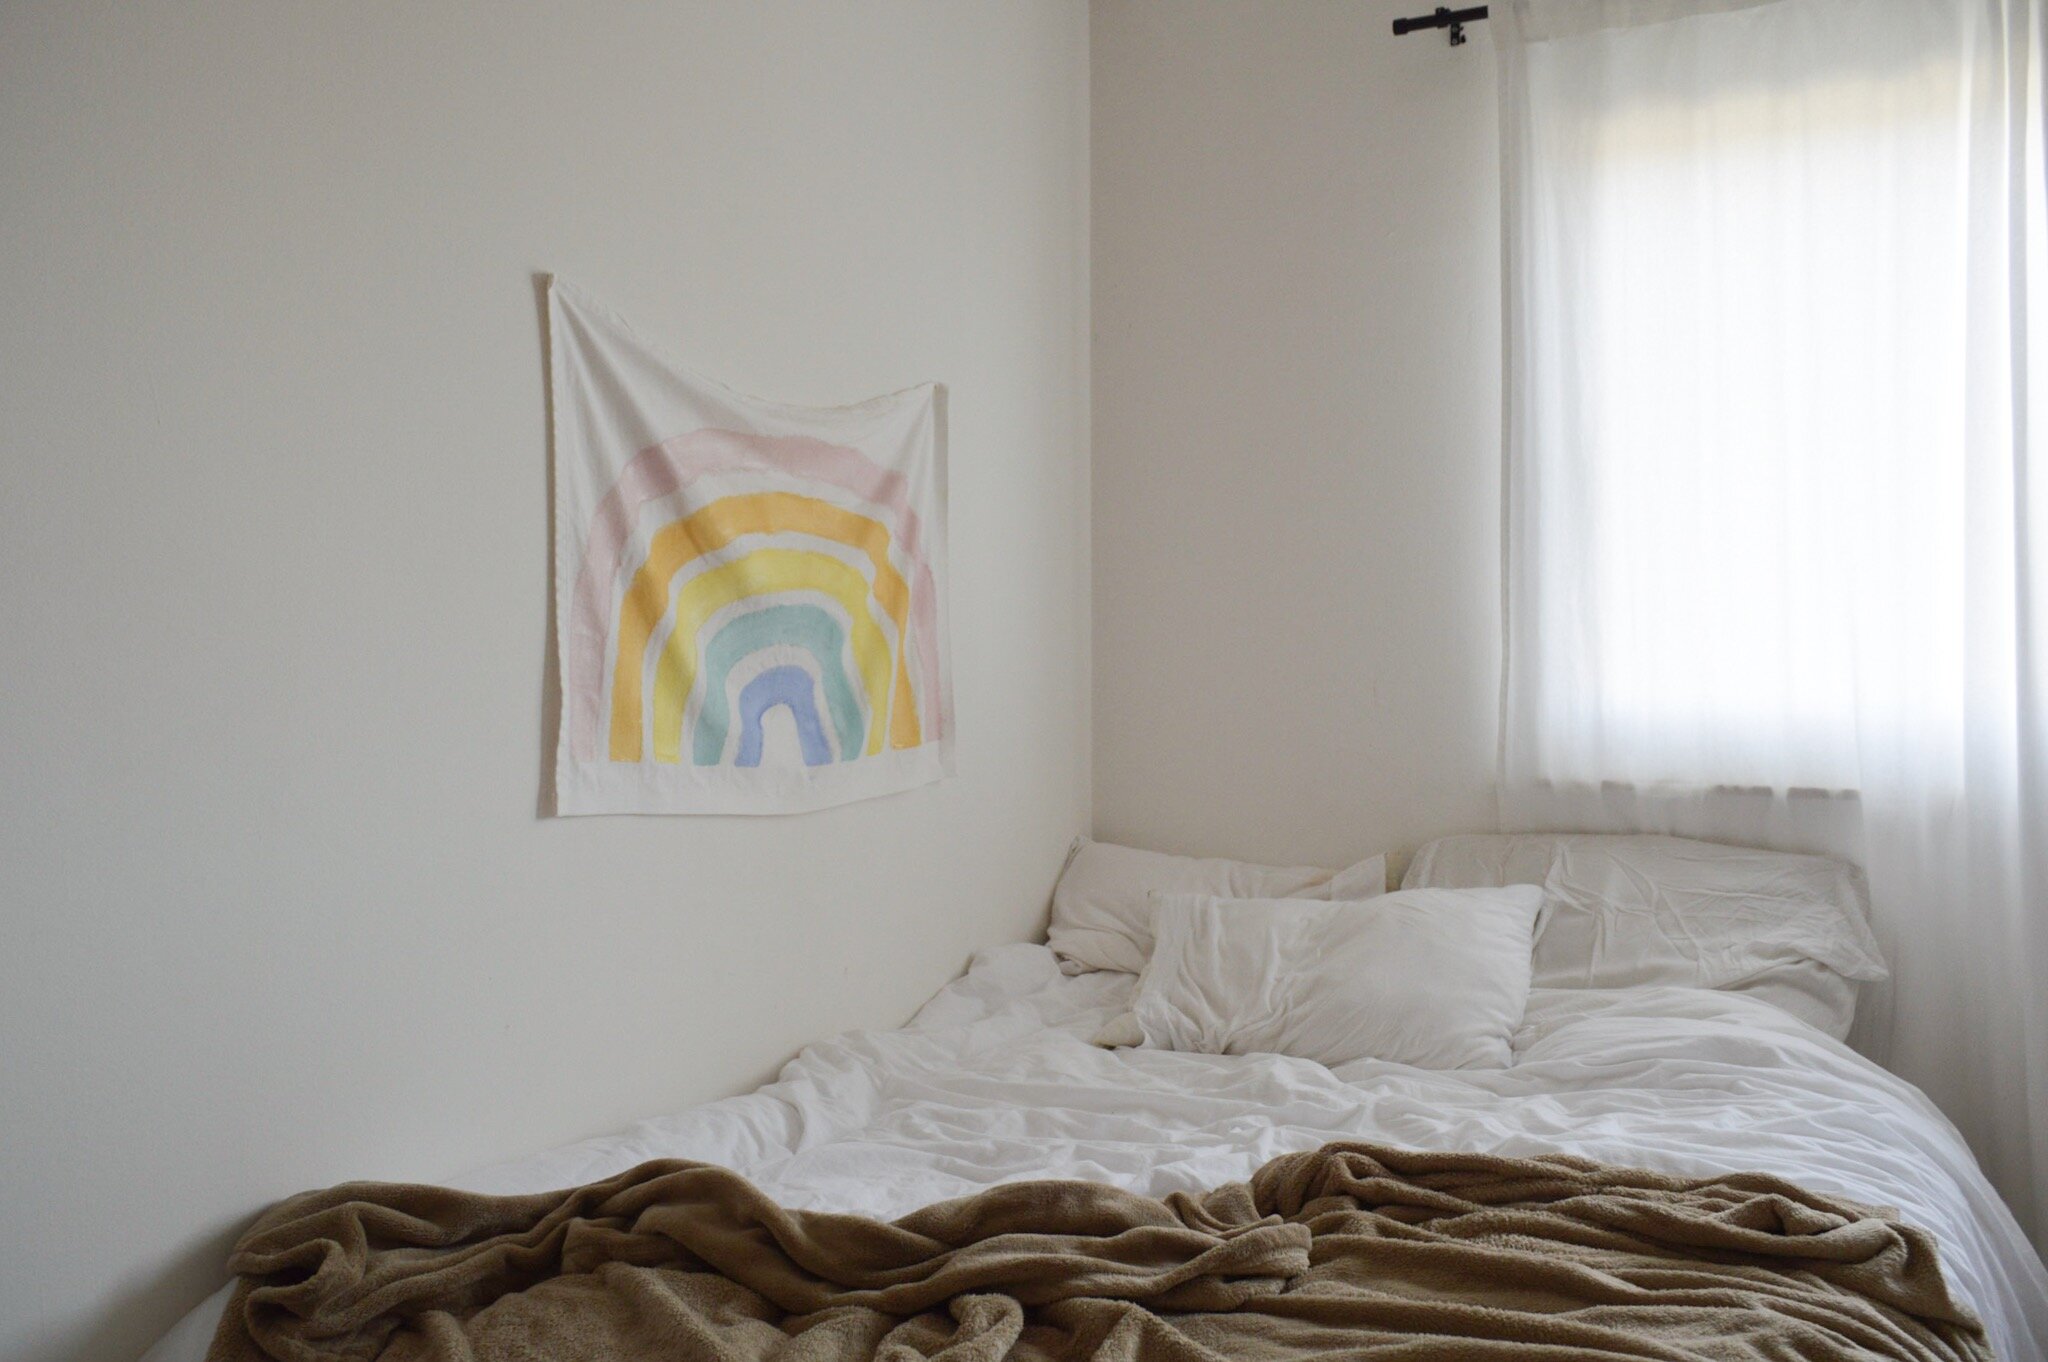
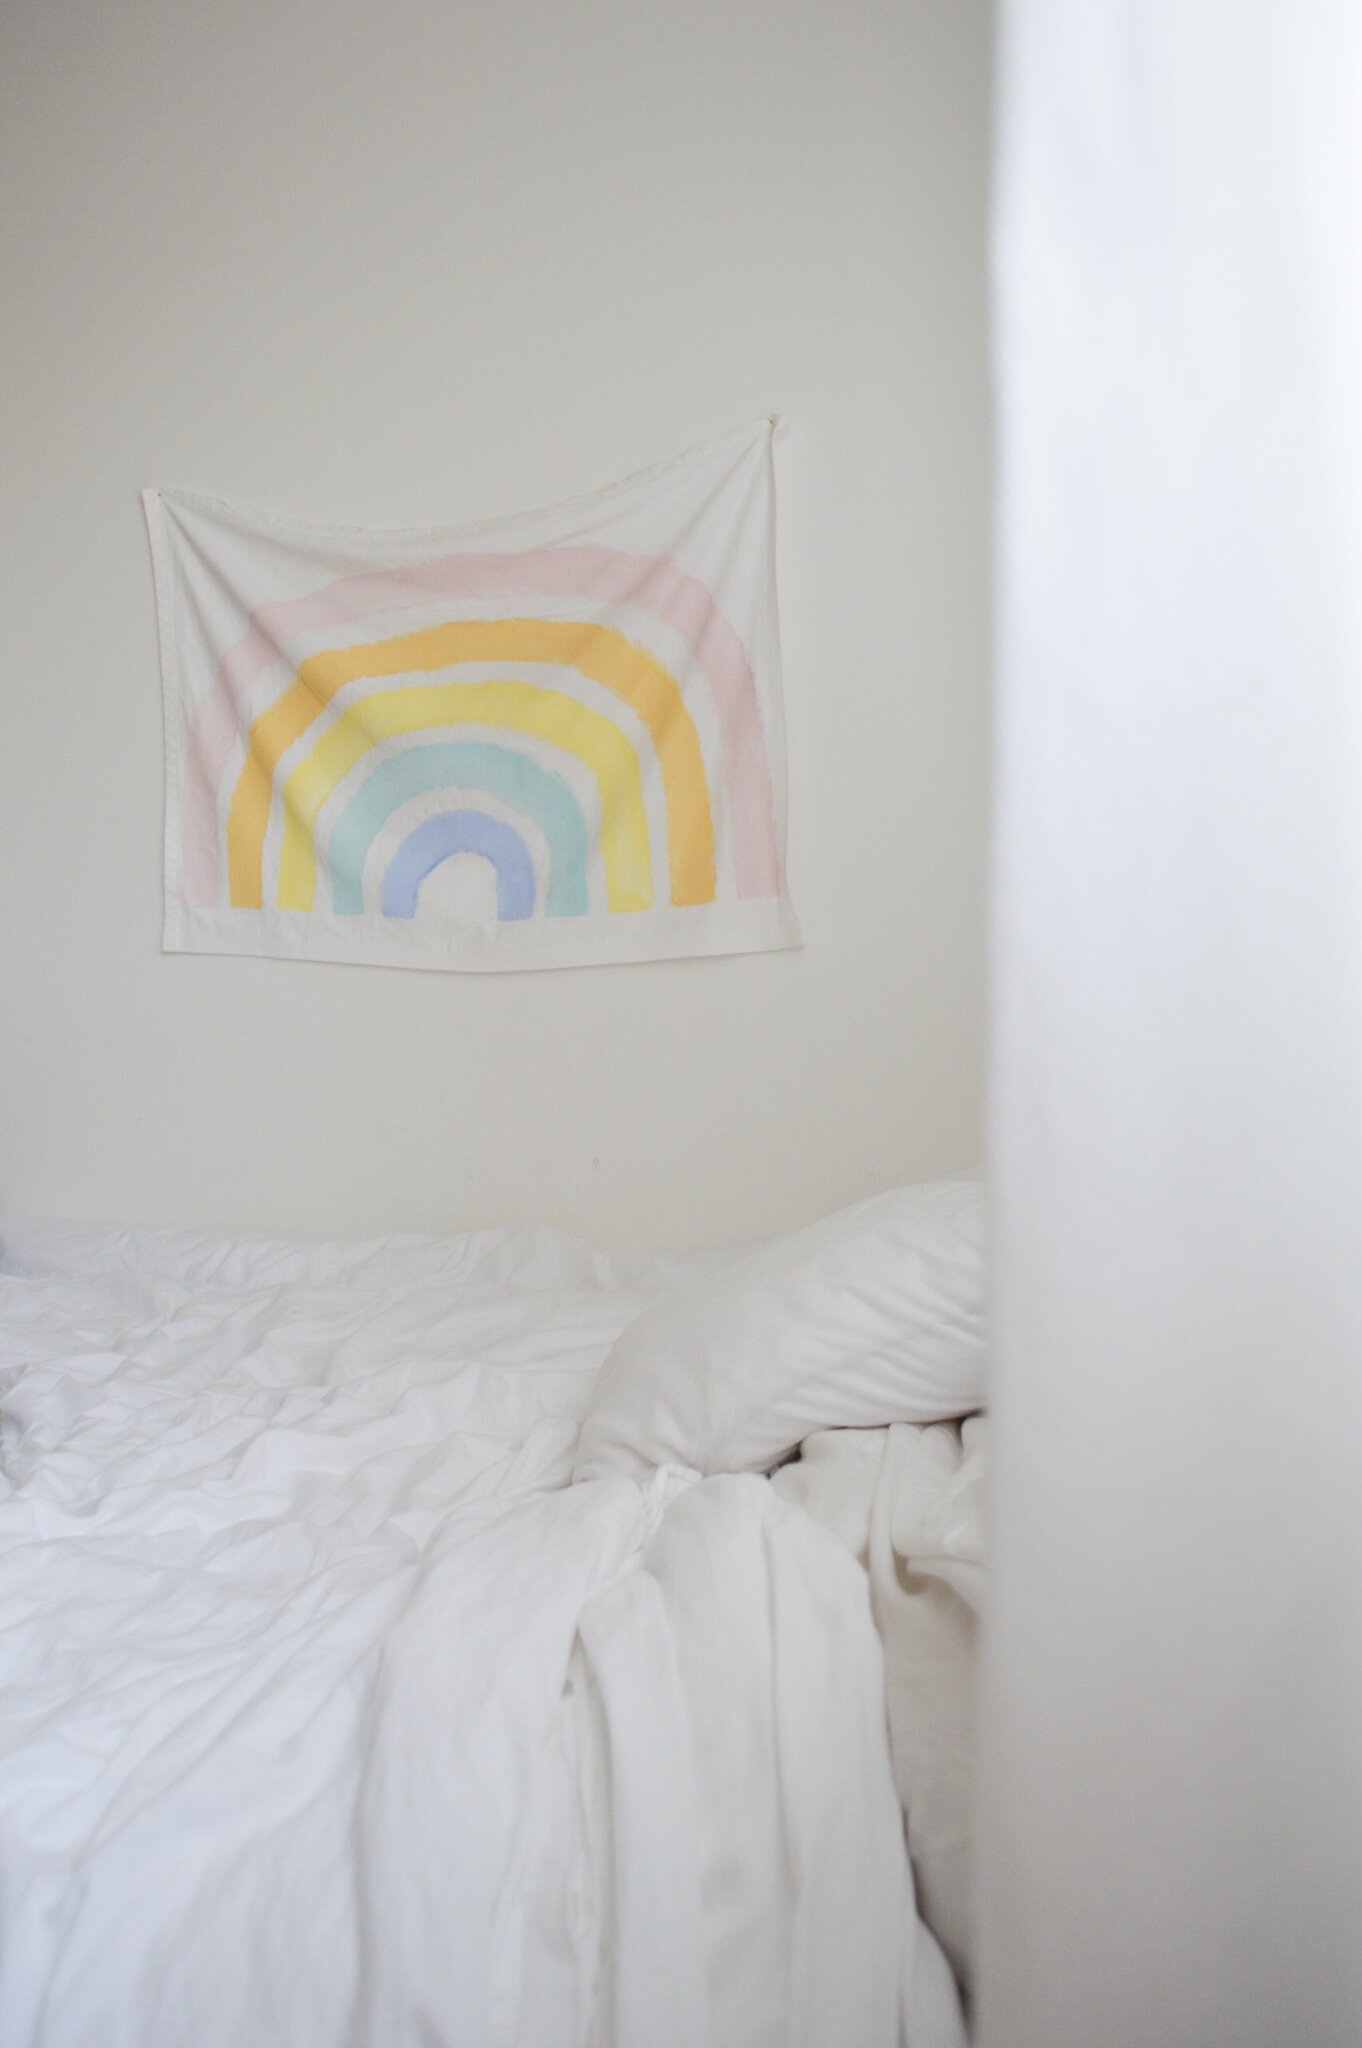
I’ve been so intentional with our home in the last few years (letting go of things we didn’t love + trying to create more functional/meaningful/beautiful spaces). It usually means dealing with blank white walls until I find something I love AND can afford. And sometimes it means making that thing instead 🌈 That’s how I ended up making this DIY rainbow tapestry!
TIP: To see a video of this project, head to my Instagram and click on the DIY Rainbow highlight!!


This was one of those spur-of-the-moment late night projects that just sort of materialized … it took MAYBE 20 minutes. I didn’t overthink it or make a plan. And somehow I love it even more for how easily it came together.
Here’s what you’ll need to make your own …
Supplies:
Cotton/Linen Fabric size 26”H x 38”W (make sure to include an extra inch on each side for hemming - the finished project is 24”H x 36”W)
Fabric Paint in a variety of colors
Paintbrush (40mm)
Tape
Scissors
Hem Tape
Nails/Hammer for Hanging
PREPPING
Start by measuring + cutting your fabric to the right size and hem each side. If you don’t know how to hem the traditional way, hem tape is a simple/cheap alternative!
Next, quickly iron your fabric and secure it for painting. Tape it to a safe surface (like a large piece of cardboard) by running a long piece of scotch tape across the top (about 2 inches from the top edge). Do the same along the bottom and mark the middle of each piece of tape for reference.
PAINTING
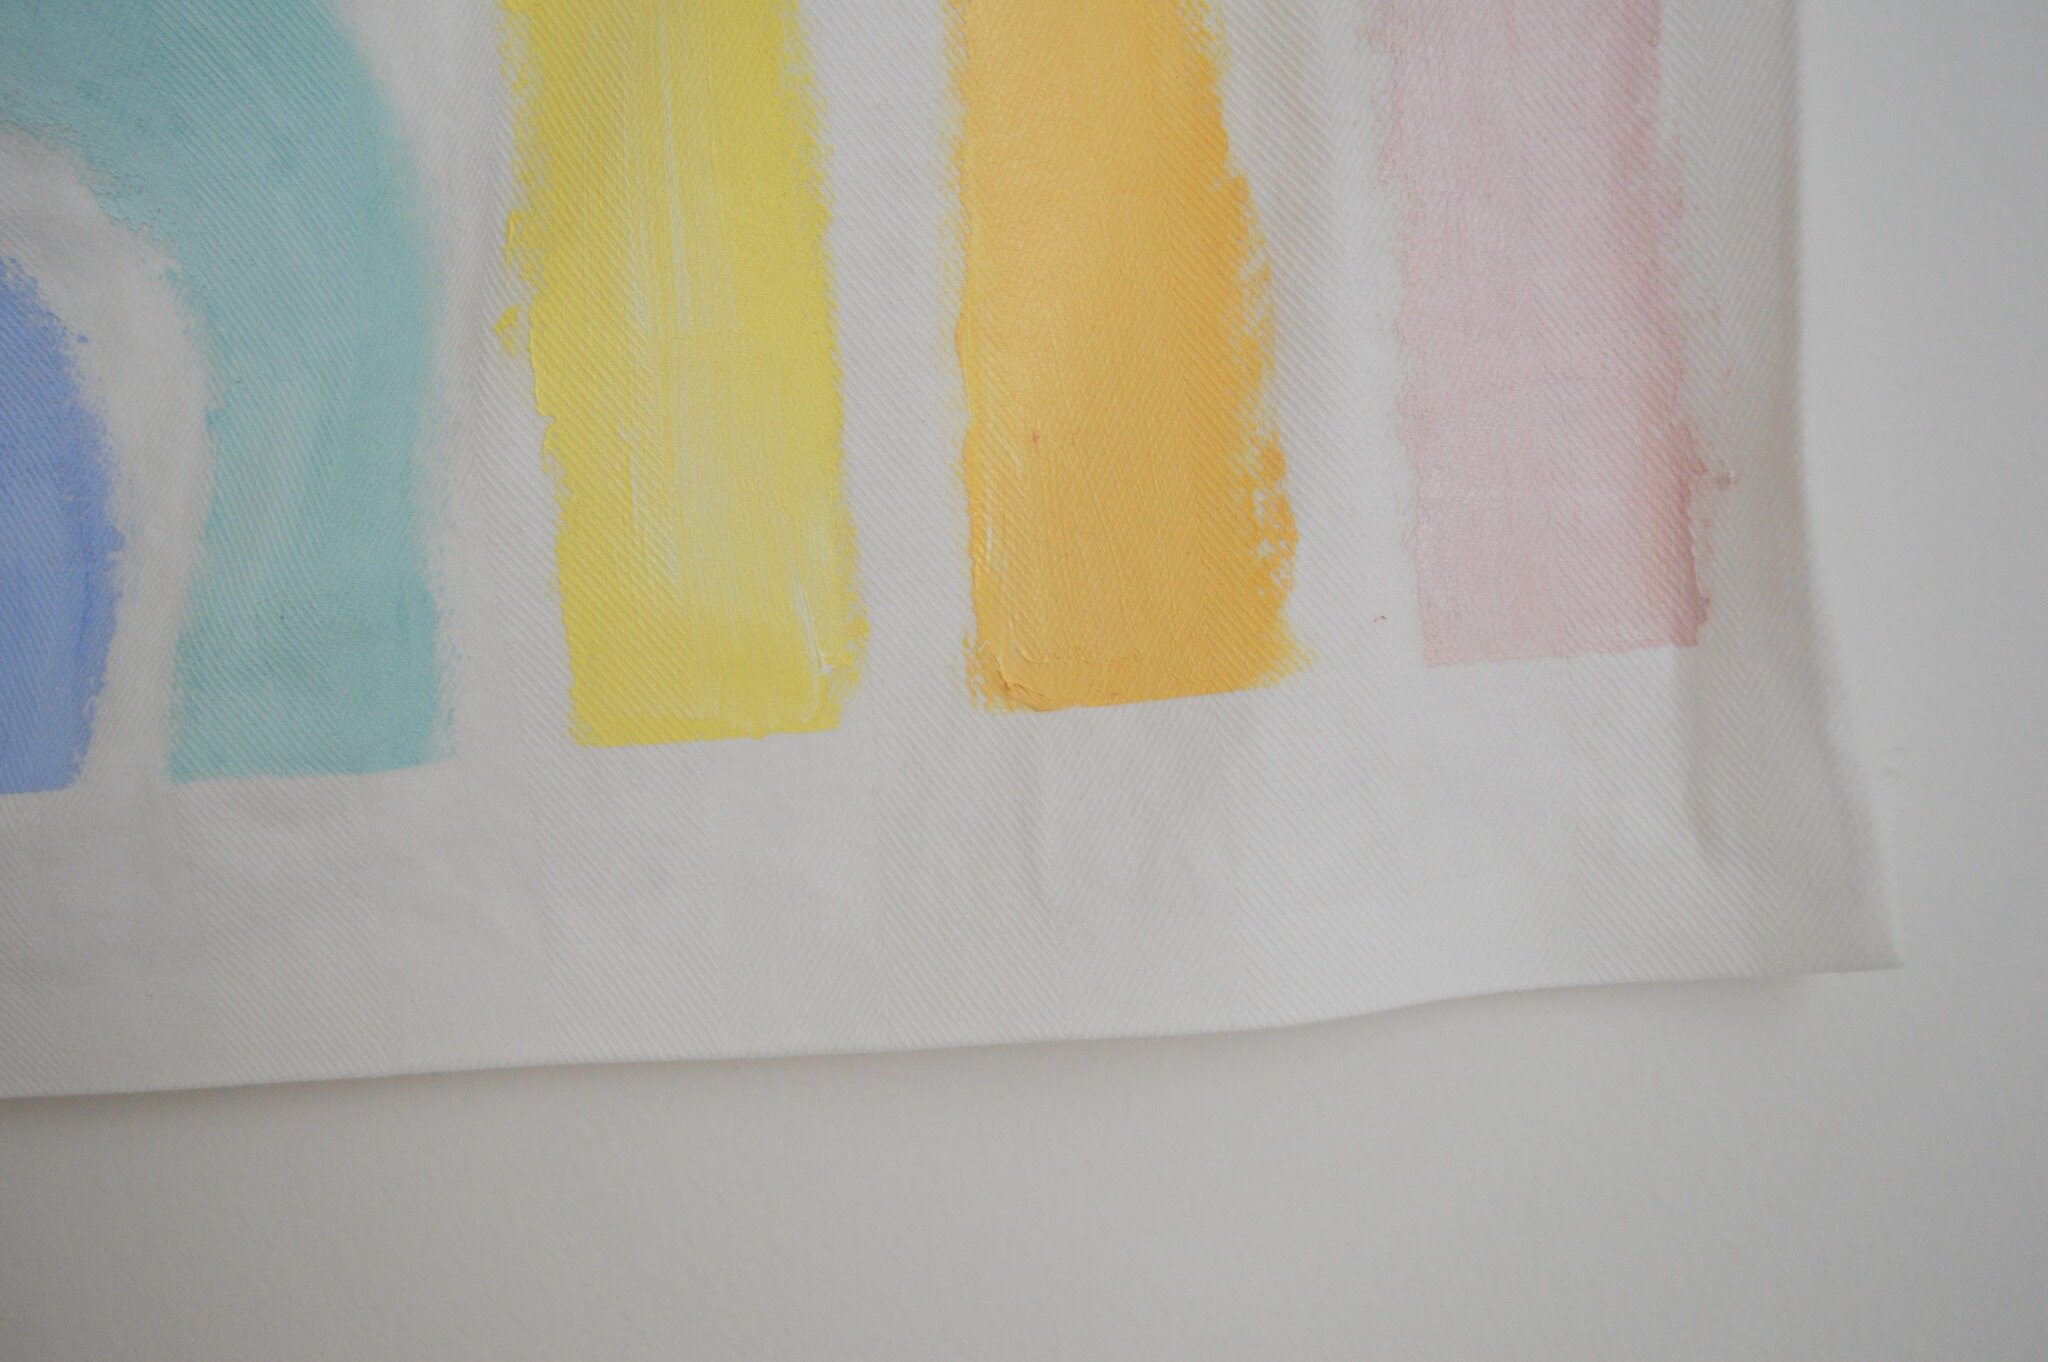
For my project, I used acrylic paint. It’s the only thing I had on hand & looks great BUT I highly recommend using fabric paint. Just follow the instructions on the back of the product!
When picking my colors, I used darker/medium shades of pink, orange, yellow, sea green, and blue. Then I blended each color with white paint until I found the shade I was looking for. Have fun with it! Remember you can tie in colors that accent your room - you don’t have to stick with the pallet I’ve used!
For the arches, here are 3 tips to help you freehand:
Use the right size paintbrush.
Keep your brush flat against the fabric as you paint.
Start with the littlest arch and work your way out.
Prep the color for the littlest arch (I mixed dark blue + white). Don’t worry about mixing it perfectly - just blend quickly and move on!

When painting, place your brush flat against the tape that’s running across the bottom of your tapestry. I started with the inside of my paint brush about 2-3 inches from center. Then, keeping the brush flat against the fabric, make your first arch.

Don’t overthink it or try to measure everything perfectly. Part of it’s charm is that it’s NOT perfect. I just painted an arch, moved over an inch, and painted another arch. You can always do a test run on paper or try to mark where each arch begins + ends … but it doesn’t have to be that complicated. (This is coming from a girl who overcomicates everything … so if you can relate, just TRY to trust me here.)
Once you’re done painting, peel the tape off the top + bottom, let it dry, and hang it on the wall using two nails.


I hope you guys have fun making this rainbow tapestry. Let me know if you have any questions and tag me on Instagram using @laceandlu so I can check our your creations!!
With love,
Lace